How to Mount a TV for a Clean, Secure Finish
A wall-mounted TV can make a living room, media room, bedroom, or office feel instantly more intentional. But learning how to mount a TV is about more than getting a screen off the furniture. The right installation protects an expensive display, creates a comfortable viewing angle, keeps cables out of sight, and leaves the room looking finished rather than improvised.
A mount that is slightly off-center, placed too high, or anchored in the wrong part of the wall can be frustrating every time you sit down. Before drilling, take a few minutes to plan the screen location, wall structure, power, and connected equipment. That preparation is what separates a secure installation from a costly do-over.
Start With the Room, Not the TV Mount
The best place for a TV depends on how the room is actually used. In a family room, the primary seating position should guide the screen location. In a bedroom, viewing from the bed may call for a higher placement and a tilting mount. In a commercial waiting area or restaurant, wide viewing angles and durability may matter more than a perfectly centered screen.
Begin by standing or sitting where people will normally watch. Mark the center of the viewing area, then consider where the TV will sit in relation to windows, lamps, and doors. Direct sunlight can wash out the picture, while glare from a glass door can make even a premium TV difficult to enjoy during the day.
A fireplace wall is a common choice, but it comes with trade-offs. A TV mounted above a fireplace is often higher than ideal, which can cause neck strain during long viewing sessions. Heat can also affect the display if the fireplace is frequently used. If that is the only practical wall, a pull-down mount may improve the viewing angle, but it adds complexity and must be selected for the TV’s size and weight.
Choose the Right Height and Viewing Distance
For most seated viewing, the center of the screen should land close to eye level. A useful starting point is 42 to 48 inches from the floor to the center of the TV, though sofa height, screen size, and the room layout can shift that number.
Larger screens naturally extend farther above and below the center point. Instead of measuring only from the floor to the bottom of the TV, measure the screen height and calculate its midpoint. Then use the mounting template and the mount’s wall plate position to determine exactly where the screws need to go. The TV’s mounting holes are not always centered on the back of the display.
Viewing distance is flexible with modern 4K TVs, but the screen should still feel comfortable rather than overwhelming. A 65-inch television often works well from roughly 6.5 to 9 feet away, while a 75-inch model may be better suited to a larger room. Picture quality, seating arrangement, and personal preference all matter, so use the numbers as a starting point, not a rigid rule.
Select a Mount That Matches Your TV and Your Goals
Every mount should be rated for the television’s weight and support its VESA mounting pattern. You can find the VESA pattern in the TV manual or specifications. It refers to the spacing of the mounting holes on the back of the screen.
Fixed mounts hold the TV close to the wall and deliver the cleanest, most picture-frame-like appearance. They are an excellent fit when the screen will be viewed straight on and cable access is planned before installation. Tilting mounts let you angle the screen downward, which helps when the TV sits higher than eye level. Full-motion mounts extend, swivel, and tilt, making them useful for corner installations, open-concept rooms, and spaces with multiple viewing positions.
The trade-off is that a full-motion mount puts more leverage on the wall and usually holds the TV farther out. It needs especially solid anchoring. It can also reveal more of the side profile and cabling when extended, so cable management deserves extra attention.
Find the Structure Behind the Wall
This is the step that determines whether the installation is genuinely secure. In a standard drywall wall, the mounting bracket should be attached directly to wood or metal studs whenever possible. A stud finder is helpful, but verify the reading by checking more than one point vertically and using a small test hole if necessary.
Do not rely on basic drywall anchors to support a television. Even if they claim a high weight rating, a moving TV on an articulating mount creates forces that are different from a static picture frame. The mounting hardware needs to match the wall construction and the mount manufacturer’s instructions.
Florida homes can present a wide range of wall types, including drywall over wood framing, metal studs, concrete block, and poured masonry. Masonry walls may require a hammer drill, masonry bit, and appropriately rated anchors. Metal studs can require specialized mounting solutions, particularly for larger TVs or full-motion mounts. When the wall structure is uncertain, stopping to assess it is smarter than forcing a standard kit to work.
Before drilling, also scan for outlets, switches, plumbing, and wiring. A stud finder with live-wire detection can help, but it is not a substitute for caution. Never drill blindly near electrical boxes or through an area where utilities may run.
Plan Power and Cables Before Hanging the Screen
Visible cords can ruin an otherwise polished TV installation. More importantly, running a standard extension cord inside a wall is unsafe and generally does not meet electrical code. If the TV needs power behind it, install a code-compliant recessed outlet or power relocation system, ideally with help from a qualified professional.
Think beyond the power cable. Your TV may need HDMI connections for a cable box, game console, soundbar, receiver, streaming device, or AV distribution system. It may also need an Ethernet connection if Wi-Fi performance is inconsistent in that part of the home. Running the right in-wall rated cables or conduit before the TV goes up gives you room to upgrade later without opening the wall again.
Conduit is particularly valuable in a high-performance media room. It creates a protected path for future HDMI, network, and control cables as technology changes. For a clean wall, connected equipment can be placed in a nearby cabinet, closet, or AV rack instead of crowding the space directly under the screen.
How to Mount a TV Step by Step
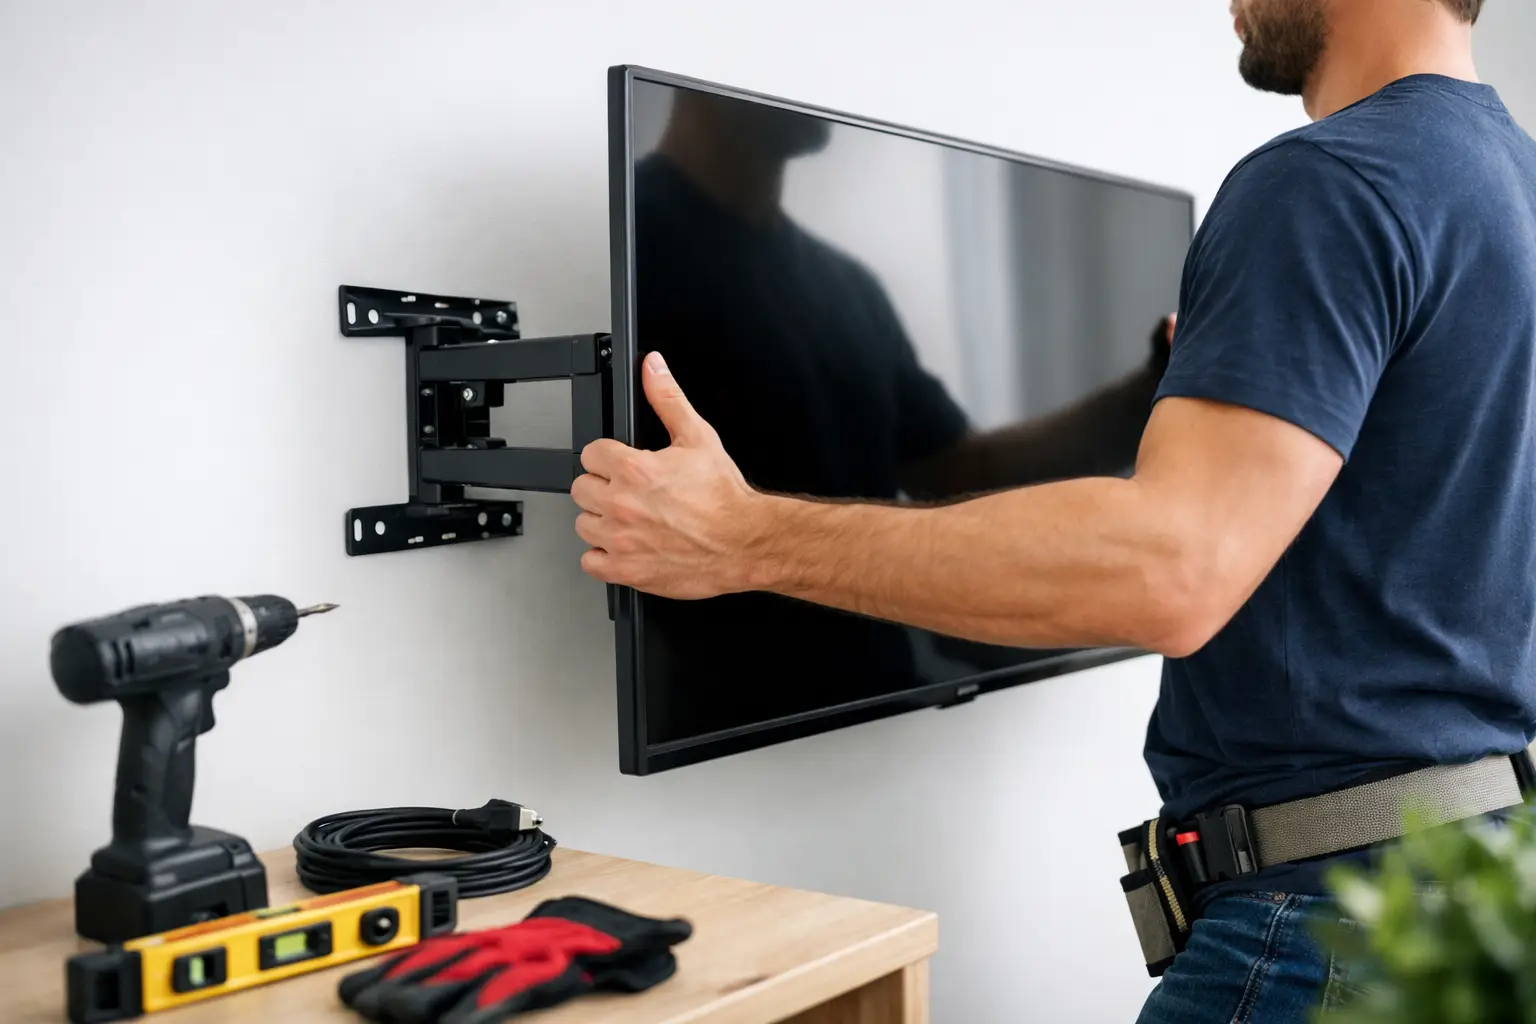
Once the location, wall structure, and cable plan are confirmed, the physical installation becomes straightforward. Keep a second person available for lifting the TV, especially for screens larger than 55 inches.
- Attach the correct mounting arms or brackets to the TV using the supplied spacers and screws. Use only hardware that fits the TV correctly. Screws that are too long can damage the panel.
- Hold the wall plate against the wall at the planned height. Use a level, mark the anchor points, and confirm that the plate aligns with the studs or approved mounting locations.
- Drill pilot holes and install the wall plate with the appropriate lag bolts, masonry anchors, or hardware for the wall type. Tighten the hardware firmly without stripping it.
- Connect power and low-voltage cables before lifting the TV into place. This is much easier than trying to work behind a large screen afterward.
- With two people, lift the TV onto the wall plate and engage the mount’s locking mechanism. Confirm that every safety latch or security screw is fully secured.
- Level the screen, test the tilt or swivel range if applicable, and check that cables do not pull, pinch, or bind as the mount moves.
After installation, spend a few minutes with the remote in hand. Check for glare at different times of day, adjust picture settings, test every connected device, and make sure the sound matches the screen placement. A soundbar should be mounted or positioned so it does not block the TV’s infrared sensor or interfere with the screen’s movement.
When Professional Installation Makes Sense
A straightforward fixed mount on an accessible wood-stud wall can be a manageable project for a confident DIY homeowner. The decision changes when the TV is large, the wall is masonry, the mount has motion, power must be relocated, or the goal is completely concealed wiring. Those details affect safety, code compliance, and the finished appearance.
Professional installation is also valuable when the TV is part of a larger entertainment system. A properly designed setup can integrate a soundbar or surround sound, streaming devices, whole-home audio, smart controls, and a reliable network connection without leaving a collection of visible boxes and cables behind. Frequencies USA helps Florida homeowners and businesses create that clean, customized result with equipment guidance and professional installation.
A mounted TV should feel like it belongs in the room from the moment it turns on. Take the time to plan the wall, height, wiring, and viewing experience, and the result will be safer, easier to use, and far more enjoyable every day.
 Previous Post
 Next Post