How to Hide Speaker Wires Without Losing Sound
A great sound system should be the first thing you notice when the movie starts, not when you walk into the room. Learning how to hide speaker wires is the difference between a living room that feels carefully designed and one that feels temporarily set up. The right approach protects audio performance, keeps wires out of sight and reach, and preserves the clean finish of your home or business.
The best method depends on the room, wall construction, speaker placement, and whether you own or lease the property. A simple surface-mounted raceway can be an excellent solution in an afternoon. For a home theater, multi-zone audio system, or outdoor entertainment area, professionally routed in-wall wiring usually delivers the most polished result.
Plan the speaker layout before hiding wires
Start with where the speakers need to live, not where the wires are easiest to hide. Front speakers should support the TV or projection screen, surround speakers should create an enveloping sound field, and outdoor speakers should direct sound toward the seating area rather than the neighbors. Once placement is right, map the cleanest path back to the receiver, amplifier, or media cabinet.
Measure each run with extra length for vertical drops, turns, and future service. Avoid pulling speaker wire tightly from point to point. A little accessible slack at the equipment location and behind wall plates makes upgrades or repairs much easier later.
If your system includes a subwoofer, remember that it may need a power outlet in addition to an audio connection. That is one reason planning the whole room matters. Speaker wire is low voltage, but power wiring has different routing and safety requirements.
How to hide speaker wires inside walls
Running speaker wire inside a wall is the cleanest option for finished media rooms, living rooms, offices, and dedicated home theaters. Wires disappear behind drywall and emerge only at neat wall plates or directly behind the speaker location. When completed properly, the result looks intentional and adds visual polish without compromising access to your equipment.
Use speaker cable rated for in-wall installation, commonly labeled CL2 or CL3. Standard lamp cord, exposed cable, or an old wire of unknown condition should not be repurposed inside walls. In-wall rated cable is designed for this application and helps support a safer, more professional installation.
A typical route starts behind the AV cabinet, travels through the wall cavity or ceiling space, and terminates near each speaker. Low-voltage mounting brackets and brush plates or binding-post wall plates create a clean finish. The wire should be supported where appropriate, protected from sharp edges, and kept away from high-voltage electrical wiring to reduce the chance of interference and to follow safe installation practices.
Know what is behind the drywall
In Florida homes, wall construction can vary considerably. Some rooms have straightforward wood framing and attic access, while others involve concrete block walls, metal studs, insulation, plumbing, or limited pathways between floors. Before cutting openings, identify studs and scan for electrical lines, pipes, and other obstacles.
This is where a professional assessment saves time. A clean in-wall route may be simple in one room and impractical in the next. If the path requires extensive drywall repair, crosses a difficult block wall, or creates a complicated route around structural elements, a surface solution may offer better value while still looking excellent.
Use paintable raceways for a fast, clean upgrade
Paintable cable raceways are a smart choice when opening walls is not desirable. These narrow channels mount to the wall surface, conceal speaker wire, and can be painted to match the wall color. They work especially well for renters, commercial spaces, condominiums, and rooms where the equipment layout may change.
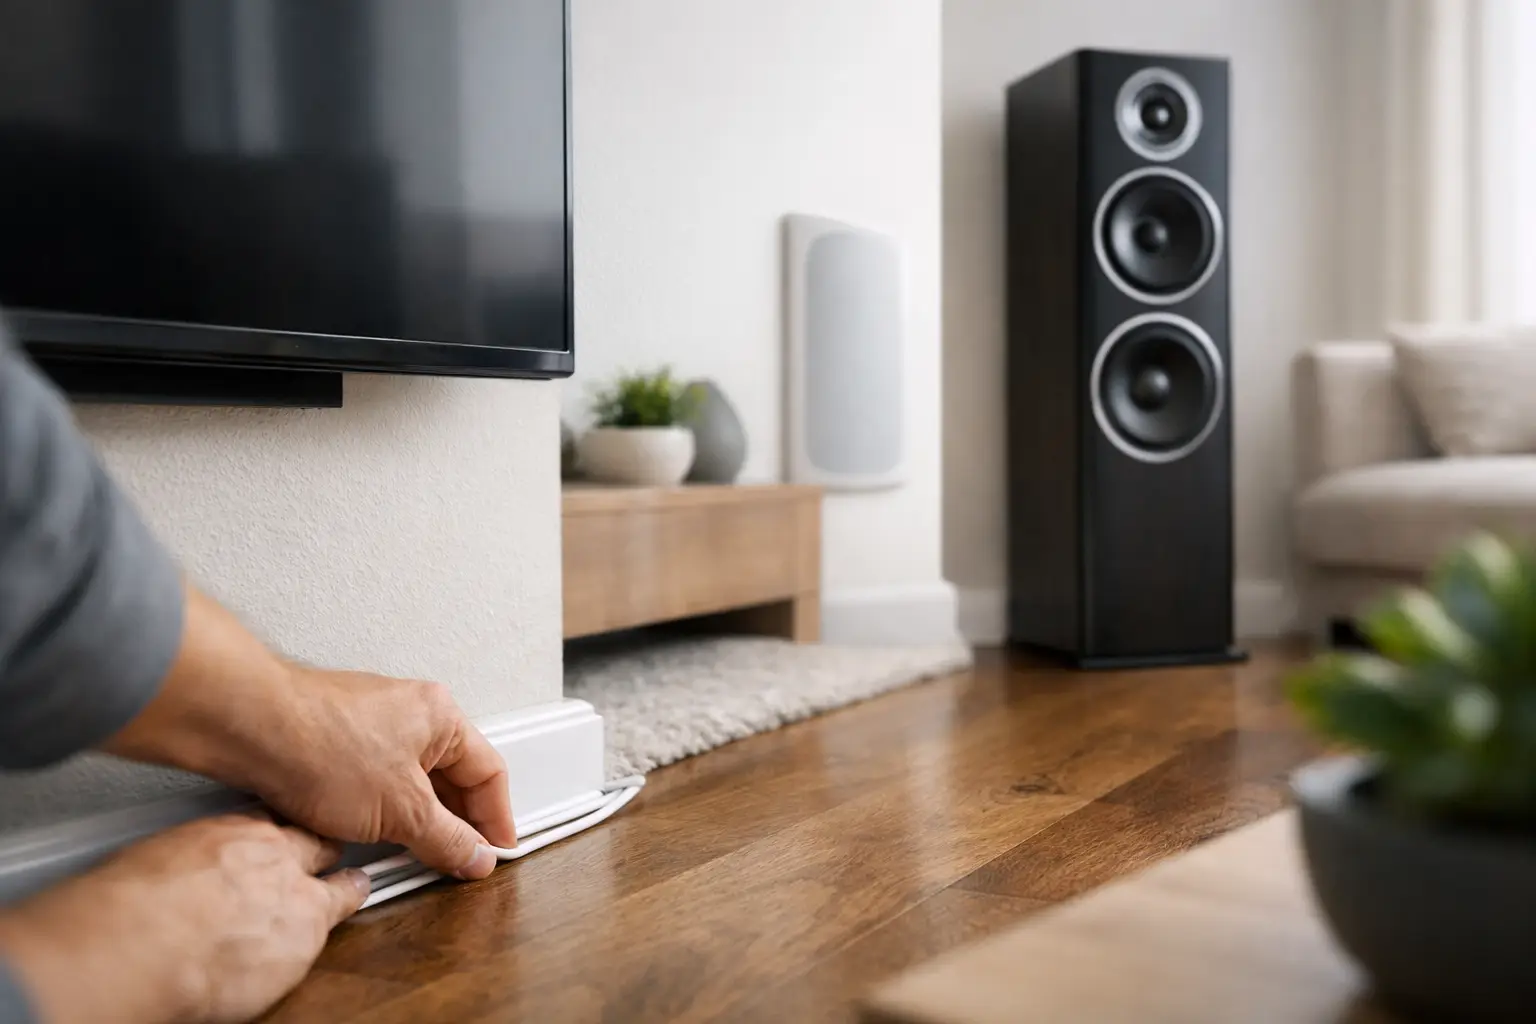
Install the raceway along natural architectural lines whenever possible. Run it vertically beside a media cabinet, horizontally along the baseboard, or near a door frame rather than across an open expanse of wall. The goal is not merely to cover a wire. It is to make the route visually disappear into the room.
Raceways do have trade-offs. They remain slightly visible up close, and large bundles of cable need wider channels. Still, for a single surround speaker or a pair of rear speakers, a properly painted raceway is often far more attractive than a loose wire crossing the floor.
Hide speaker wire along baseboards and furniture
Baseboards provide one of the most practical wire paths in existing rooms. Speaker wire can be routed tightly along the top or bottom edge of the baseboard, then covered with a low-profile channel or tucked behind removable trim where appropriate. This approach keeps cables low, out of the main sightline, and away from foot traffic.
Furniture can also help conceal the final portion of a run. A console, bookcase, sectional, or built-in cabinet can hide cable paths behind or beneath it, provided the wire is not pinched. Leave enough room around receivers and amplifiers for ventilation. Hiding equipment should never mean trapping heat.
Avoid relying on loose rugs as a permanent speaker-wire solution. Flat cord covers can make a temporary floor crossing safer, but wires under rugs may shift, become damaged, or create a trip hazard. They are better suited to short-term setups than a finished entertainment space.
Choose the right wire for the distance
Concealing wire is only worthwhile if the system still sounds the way it should. Wire gauge matters more as cable runs get longer. For many typical room installations, 16-gauge speaker wire is suitable. Longer runs, higher-powered systems, and outdoor zones may benefit from 14-gauge or 12-gauge wire.
There is no benefit to hiding an undersized cable that limits performance, nor is there always a need to overspend on extremely thick wire for a short run. The right cable depends on distance, speaker impedance, amplifier power, and the design of the system. A custom plan accounts for those variables before walls are closed or channels are installed.
Label both ends of every wire, particularly in systems with surround sound, multiple rooms, or outdoor speakers. Labels are a small detail that prevent confusion when equipment is moved, serviced, or upgraded years later.
Special considerations for outdoor speakers
Outdoor audio needs a different level of planning. Florida sun, rain, humidity, and pool-area conditions can quickly expose weak installation choices. Outdoor-rated speaker wire, weather-resistant connections, protected cable pathways, and careful placement all help the system remain dependable while preserving the look of the patio, lanai, or landscape.
Rather than stretching cable visibly across a deck or around a pool enclosure, wire can often be routed through attic space, exterior walls, conduit, planting beds, or hardscape edges. The best route protects the cable from moisture, yard equipment, UV exposure, and accidental pulls.
For landscape audio, burying cable may be appropriate, but it should be designed around drainage, irrigation, and future landscaping. A wire path that looks fine on installation day should also be serviceable after new plantings, pavers, or lighting are added.
When professional installation is worth it
A do-it-yourself raceway project can be a good fit for a straightforward room with one or two short wire runs. Professional installation becomes especially valuable when the project involves in-wall routing, ceiling speakers, a mounted TV, distributed audio, outdoor zones, attic work, or a finished room where mistakes would be costly.
A qualified AV installer can design speaker locations, select the appropriate cable, route it cleanly, terminate connections correctly, and test the entire system before the job is complete. That means no guesswork about which wire feeds which speaker, no exposed runs around the room, and no compromise between sound quality and aesthetics.
For homeowners in the Tampa Bay area, Frequencies USA can build a concealed-wiring plan around the room you actually use, whether that is a family living room, a media room, a poolside entertainment space, or a business waiting area. A free estimate is a practical first step when you want a finished look without turning your space into a construction project.
The best hidden-wire installation is one you stop thinking about. Your speakers should fill the room with clear, satisfying sound while the walls, floors, and furnishings keep the attention they deserve.
 Previous Post
 Next Post