Media Room Wiring Case Study That Stays Hidden
A media room wiring case study is rarely about the wire itself. The real test is whether a family can press one button, settle into their seats, and enjoy a movie without seeing a tangle of cords, opening a cabinet full of blinking equipment, or troubleshooting why the sound is not working.
This representative Florida media room project began with a familiar goal: transform an underused bonus room into a polished entertainment space with a large TV, immersive surround sound, reliable streaming, gaming connections, and simple everyday control. The homeowners also had a non-negotiable request: no exposed wiring. Every decision, from the TV location to the equipment rack, had to support that clean finished look.
The Starting Point: A Great Room With Hidden Challenges
The room had the right footprint for a media space, but the existing construction created limitations. It was a finished second-floor room with drywall, insulated exterior walls, a short attic path, and only a few outlets in convenient locations. The homeowners wanted the display mounted on the feature wall, while the AV components needed to live across the room in a closet to keep the viewing area uncluttered.
That distance changed the scope. A basic television installation might hide a power cord and one HDMI cable behind the display. This room needed pathways for video, network access, speakers, control, and future service. Simply pulling a few cables through the wall would have created a system that worked on day one but became difficult to update later.
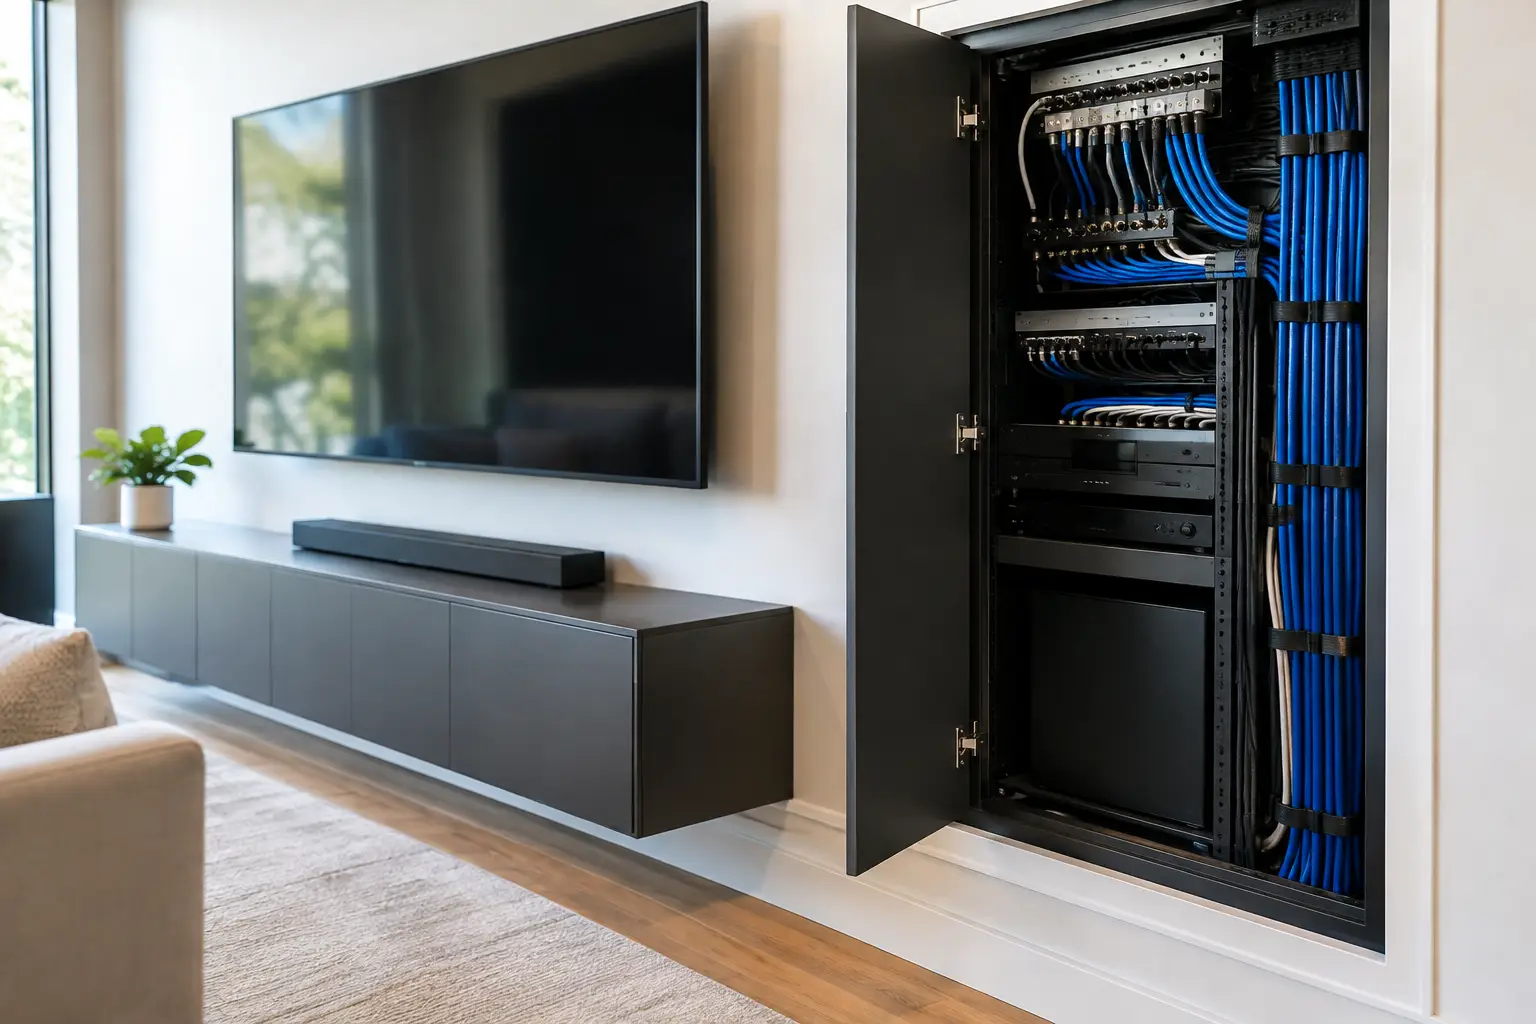
The first design decision was to separate what the family would see from what the system needed to operate. The room would have one clean display wall, discreet in-wall or architectural speakers, and a single easy-to-use remote or control interface. The sources, networking gear, power protection, and connections would be organized in a ventilated equipment location outside the room.
Media Room Wiring Case Study: Designing Before Cutting
The best wiring plans start before a wall is opened. In this case, the system design accounted for the family’s current needs and likely next steps. They wanted streaming, cable service, a game console, and a surround sound receiver. They also wanted the option to add upgraded audio, more sources, or a projector later without turning another renovation into a major drywall project.
That meant using appropriately sized conduit where future access mattered most. Conduit costs more than running a single direct cable, and it is not necessary in every wall. But for a display location or a difficult route between an equipment rack and the room, it provides valuable flexibility. If a video standard changes or a cable is damaged, a technician can often pull a replacement without opening finished surfaces.
The wiring layout also separated low-voltage cabling from electrical power where required. This helps support safe installation practices and reduces the chance of interference. The TV received a proper recessed power solution, while video and control cabling traveled through dedicated low-voltage pathways.
For the display connection, the design included a certified high-bandwidth video path capable of supporting modern 4K content and a network connection at the TV location. Wi-Fi is useful, but a hardwired connection can provide more consistent performance for streaming, gaming, and future smart-TV updates. In a media room, reliability is part of the experience.
Why the Equipment Location Mattered
Placing equipment in a closet is not just about hiding boxes. It also makes the room quieter and easier to maintain. Game consoles, cable boxes, AV receivers, network switches, and power equipment generate heat. If they are packed into a closed cabinet with no airflow, performance and equipment life can suffer.
The closet in this project received structured cable management, labeled connections, power protection, and ventilation planning. Labeling may sound like a small detail, but it pays off when a homeowner adds a device, changes internet providers, or needs service years later. A clean rack lets a technician identify each connection quickly instead of tracing mystery cables through a pile.
There is a trade-off here. A centrally located AV receiver makes it easy to connect sources directly, but it can clutter the room and introduce heat and fan noise. Moving equipment to a remote location preserves aesthetics, yet requires better planning for control signals, video transport, and speaker wire runs. The right answer depends on the room, the system, and how much expansion the homeowner expects.
Concealed Speaker Wiring Without Compromising Sound
The audio plan called for surround sound that felt immersive without making the room look like a recording studio. Speaker locations were selected based on the seating position, room dimensions, and ceiling construction rather than just placing speakers wherever framing was easiest.
Speaker wire was run before final speaker cutouts were made, leaving enough service loop for clean termination and future adjustment. The team avoided routes that could be damaged by screws, trim work, or future wall-mounted décor. Where wiring passed through framing, it was protected and secured to prevent rattles or movement inside the wall.
For this project, discreet speakers were the best visual fit. That is not always the best acoustic choice for every room. Freestanding speakers can deliver excellent performance and may offer more placement flexibility, especially for dedicated theater spaces. But in a multipurpose media room, in-wall and in-ceiling options can provide the right balance of sound quality, clean design, and usable floor space.
Subwoofer placement was treated differently. Low-frequency performance depends heavily on the room, and hiding a subwoofer completely can compromise results. The final plan allowed for a placement that blended with the furnishings while remaining accessible for tuning. Good media room design is not about making every component invisible at any cost. It is about hiding what should disappear and placing performance-critical equipment where it can do its job.
The Network Was Part of the Entertainment System
A media room can have premium video and audio equipment yet still disappoint if streaming pauses or wireless control drops out. That is why the network plan was included from the beginning rather than treated as an afterthought.
The equipment closet received a wired network connection and a properly organized switch for the media devices. The TV and primary control hardware had hardwired access, while the room’s wireless coverage was evaluated for phones, tablets, and smart-home control. In larger Florida homes, especially those with concrete block construction or additions, a single router often cannot provide dependable coverage everywhere it is needed.
A professionally designed Wi-Fi mesh system may be the better answer when coverage is inconsistent across bedrooms, outdoor areas, and entertainment spaces. In this room, the wired backbone reduced dependence on wireless signals for the devices that mattered most during movie night.
Installation Day: Clean Work, Controlled Disruption
The installation process was planned to limit disruption to the finished home. Access points were selected carefully, wall openings were kept to the minimum required, and all exposed areas were protected during work. After cables were pulled and tested, the display, speakers, and equipment were installed with a focus on alignment and finish quality.
Testing happened in stages. Each cable was verified before equipment was mounted or enclosed. Video was tested at the expected resolution, speaker channels were checked individually, network connections were confirmed, and the control system was programmed around the family’s actual routines. A system is only convenient if the controls make sense to the people using it.
The final setup allowed the homeowners to turn on the room, choose a source, adjust volume, and enjoy the system without managing multiple remotes or changing inputs by hand. The walls stayed clean, the equipment remained accessible, and the room kept its original purpose as a comfortable place to spend time together.
What This Project Teaches Homeowners
The biggest lesson from this media room wiring case study is that wiring should be designed around the finished experience, not just the equipment list. A TV mount, speakers, and a receiver can be installed quickly. Creating a room that looks polished, performs reliably, and remains easy to upgrade requires a more complete plan.
For a new build, prewire is the ideal time to create those pathways. For an existing home, a professional can often use attics, closets, crawlspaces, conduit, and targeted wall access to achieve a clean result without a full remodel. The approach depends on the construction, the room layout, and the level of performance you want.
Frequencies USA helps homeowners create media rooms that feel simple to use and intentional in every detail. If you are planning a new entertainment space or tired of visible cords and unreliable connections, start with the room you want to enjoy, then build the wiring plan that keeps that experience looking and working right for years.
 Previous Post
 Next Post